Access GCA
Welcome to part two of “The Efficient Gunsmithing Workbench”, if you haven’t read it yet I highly recommend starting with Part 1 where I talk about setting up the bench itself.
When I am working at the bench, to be efficient I need to have the correct tools handy and not be wasting a lot of time looking for what I need.
I put my Gunsmithing tools into three broad categories; Tools I use constantly, tools that I use somewhat frequently, and tools I that I seldom use or only occasionally.
Under the “hand tools that I use constantly” category, because firearms are primarily held together with pins and screws, I rather obviously want my screwdrivers, pin punches, and hammers front and center to my work.
I use a combination of about 20 parallel ground screwdrivers held in racks, previously on a peg board and now held on my metal Omni Wall, and a tray of multi-tip screwdrivers bits arranged by size that fit a magnetic handpiece. Between the two sets I can usually find exactly what I need quickly.
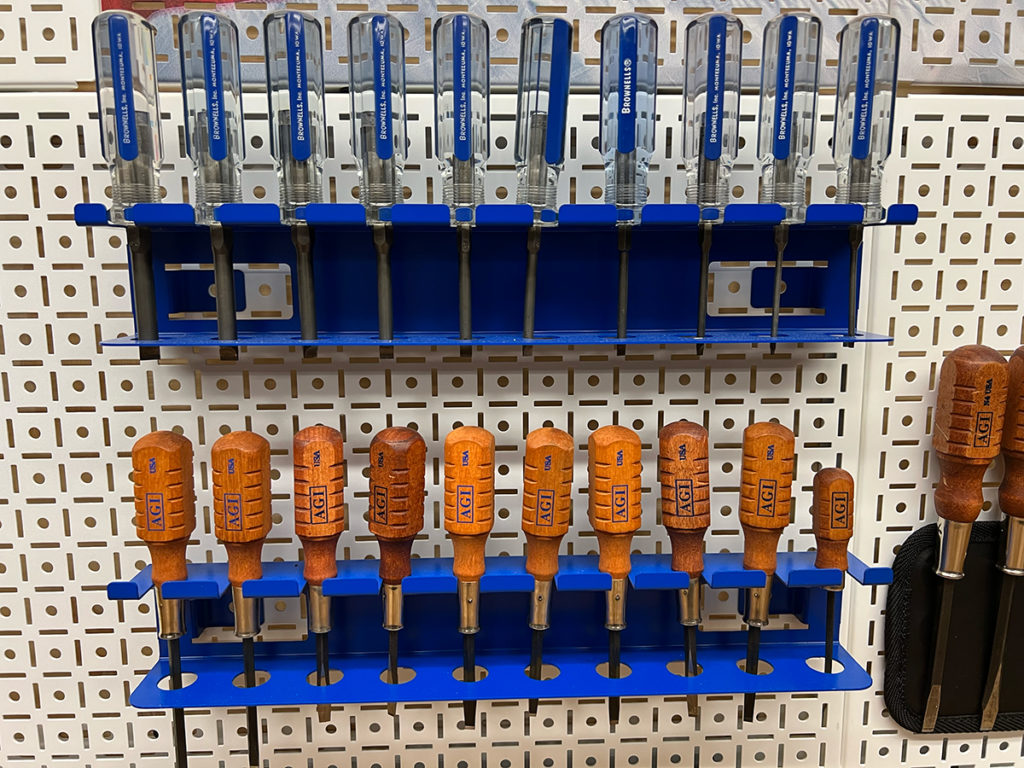
A set of Gunsmithing Screwdrivers
When hanging the screwdrivers, you don’t want to be random. Arrange them from smallest to largest, left to right or right to left, your choice for speed of finding just that right size. A poor fitting screwdriver could bugger up the screw slot and if it slips, gouge the finish on the gun (or your hand!).
My pin punches are held in a block with the punch tip side up so I can quickly select the size I am looking for. My hammers are held on the rack to the right of my screwdrivers and within easy reach.
Note: Make sure that they are held securely, you don’t want a hammer accidentally falling down and damaging the finish of a firearm you are working on.
I have 2-ounce, 4-ounce, and 8-ounce ballpein hammers, but the one I use the most is the four-ounce.
I also have within easy reach a dead-blow hammer, rubber mallet, and a plastic “no-mar” hammer. These are all pretty much “Daily use” tools.
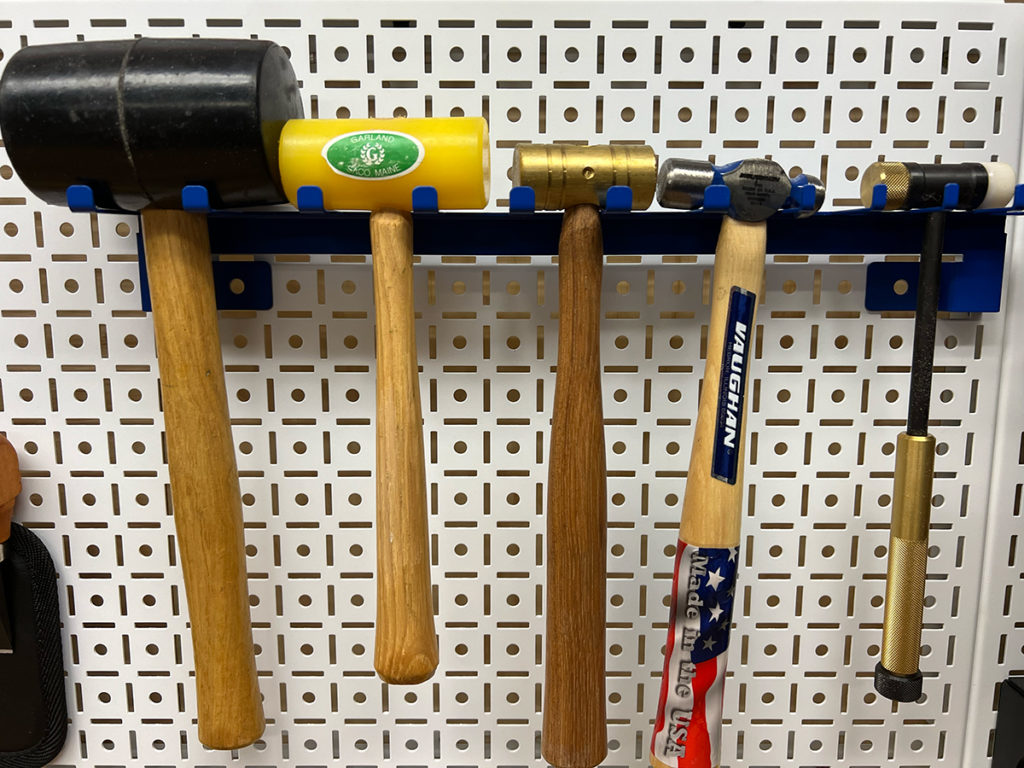
Examples of various hammers at my bench
Try to avoid having a lot of other stuff right in front of where you are working as clutter can lead to accidental damage and provide too many places for that spring or pin that just went shooting out of the gun to hide. Spending hours looking for a small part that you lost is definitely NOT efficient. Please don’t ask me how I know…..
I like to have drawers or a toolbox within reach where I store; stones, files, and other frequently used tools.
For tools that are only used once or twice a week are stored off to the side, in a drawer or hung a step or two away, and tools are used a very infrequent basis get stored out of the way.
Within my main work area, I have on my left a Versa style vise (Smooth Jaw, Parallel Vise that I often use with jaw pads to protect the parts). There are many manufacturers who make this type of vise, just be sure to get one that is well-built.
My Foredom Tool hangs just above and to the side of my primary Vise. If you’re not familiar with this tool, let me explain what a Foredom Tool is. It is composed of an adjustable hand chuck with a flexible shaft and adjustable speed settings, and uses various bits to drill, grind, polish, cut, and perform many other common Gunsmithing tasks that you’ll do on a daily basis.
I consider it to be the one power tool that is mandatory that you have for Professional Gunsmithing work!
I am going to be adding a Real Avid Tools Multi-position Master Gun Vise probably to the right side of my work area.
This vise has impressed me as being really versatile for clamping and holding parts in a variety of positions. However it I don’t think it will replace my Versa Vise for holding a part firmly to file on, stretch or bend with a hammer or punch, or cutting or grinding on with my Fordem tool. And because the Avid Vise has plastic parts, I wouldn’t want to heat, or solder on it.
I should also mention that in addition to the no plush industry type carpet that I have covering the bench to make sure I don’t scratch any guns, I use a tight weave carpet sample or scrap piece and to capture pins and parts as I tap the out of the gun. They don’t tend to roll away as much with this.
A bench block for holding parts while you tap out pins is also useful. I have ones from several different manufacturers, however AGI Instructor Mark Foster has convinced me that a $1 Hockey Puck with a ½ “ Hole drilled in the center of it is faster and works better most of the time. But having both makes life easier.
I also have small cans of “Gunsmith’s Glue” (Moly Grease or standard grease) handy. This comes in really handy when you are reassembling a firearm and you need a “third hand” (small amount of grease) to hold a small pin in position to tap it in or hold a spring in a hole. (Always clean up any excess grease afterwards as you do not what that gathering dirt or grit.)
There are a lot of other smaller tools and things that you will want close by, including tweezers, wrenches, a Bearing Scraper (you will be surprised how often this comes in handy), pliers, channel locks, vise grips, parallel jaw pliers, allen wrench sets (both “T” Handle and folding or individual wrenches), thread gauges, small wire brushes, cotton swabs, a Machinist Ruler, Square, Torque Wrench, Socket set, Needle Nose Files, and numerous other small tools that generally fit under the category of Frequently Used.
This may sound like a lot of tools, but most can be acquired very affordably, and some you might already own!
You can hang some of these and others should be in a drawer or tool chest that is within reach.
As for cleaning, this is best handled on a dedicated bench, if you have room.
To Gunsmithing Freedom,
Gene Kelly,
Gunsmith and President
American Gunsmithing Institute